How to Clean Mold

how to clean mold

It’s important to know how to clean mold since the presence of mold in your home can cause health problems for many people — especially those with conditions such as asthma, COPD, allergies, lung conditions, or who are immune compromised. If you have any of those conditions, you should definitely NOT stay in a home with mold — or even be staying inside the home when it is being cleaned.

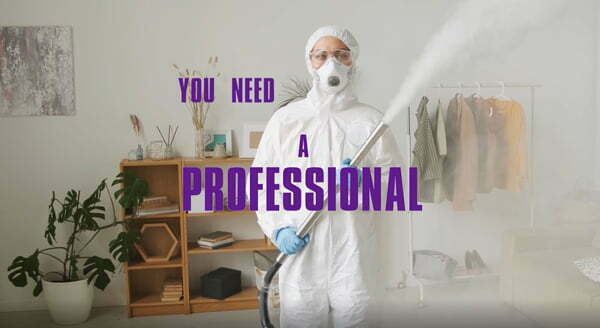
Of course, getting to the point where mold has grown to dangerous levels can usually be prevented — so these tips may help you limit your exposure to mold by cleaning it in its early stages, before it becomes a hazard. And if you need professional Mold Remediation services, we’re here for you!

Most commonly, we find mold in bathrooms where there moisture builds up due to lack of ventilation. Mold thrives in warm, humid environments and spreads quickly. Bathroom surfaces are mostly “nonporous” — like sinks, hard countertops, tile or grout — but you may also need to clean mold on “porous” surfaces as well — such as wood or drywall. We’ve got you covered there… read on for the three best mold-killing household chemicals no matter what your surface type.

But First… Dress for Success!

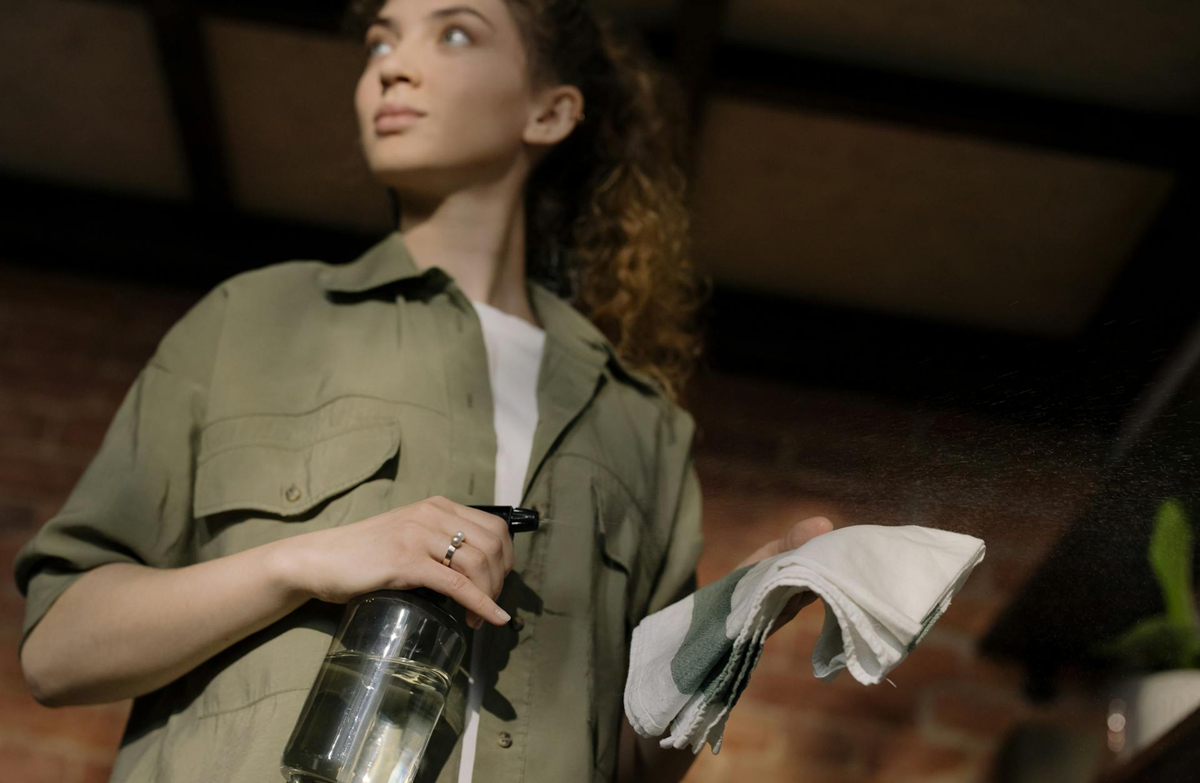
When cleaning mold, it’s best to protect yourself from exposure by wearing protective clothing (like a long sleeved sweatshirt), goggles, gloves and a facemask. Not only will this be important to prevent exposure to the mold itself, but also protect you from possible splash-back of chemical solutions you may be using to clean and kill the mold (like bleach).

What’s the Best Product for Cleaning Mold?

What’s best to use for cleaning mold? Bleach? Vinegar? Hydrogen Peroxide? You have options!

How to Clean Mold Using Bleach

Bleach is probably the most common mold-killer for nonporous surfaces (like tile, grout and ceramic), but not so effective on porous surfaces (like wood or drywall). The CDC guideline is to create a solution by mixing 1 cup bleach with 1 gallon of water. It may be helpful to fill a spray bottle to use when cleaning hard to reach places.

  1. Apply the bleach solution to the moldy surface
  2. Let it sit for 15 minutes
  3. Scrub off the mold — an old toothbrush works well for grout
  4. Rinse off with water
  5. Dry the surface thoroughly

The drawback for using bleach is the fumes which can cause irritation, so good ventilation is important. Also, NEVER mix bleach with other chemicals — like ammonia, vinegar, or other cleaning solutions — as the combination may cause dangerous and even potentially deadly fumes!

Another drawback to using bleach is that it may remove color if used on certain colored materials. Test it first on a small unnoticeable area and see if it causes discoloration. If so, use something like vinegar instead.

Finally, it’s best not to use bleach when cleaning mold in a refrigerator as it is not food-safe. Instead, use vinegar (see next).

How to Clean Mold Using Vinegar

Vinegar is another good mold-killer, effective for killing over 82% of mold species on both nonporous AND porous surfaces. It’s a good, inexpensive non-toxic alternative to bleach. Use undiluted white vinegar. Sure, your house may smell like a deli for a while, but it’s safer and less irritating than bleach!

  1. Apply to the moldy surface (use a spray bottle)
  2. Let it sit for 1 hour
  3. Scrub off the mold
  4. Wipe clean and let the surface dry

How to Clean Mold Using Hydrogen Peroxide

Hydrogen Peroxide — which you can find in most grocery stores and drug stores — is also a moderately effective cleaner, if not a bit more expensive as an option. It works well on nonporous surfaces (tile, grout, ceramics) but not quite as good as bleach. However, it doesn’t have the issue of fumes like bleach does, so if you’re sensitive to bleach’s irritating effects, hydrogen peroxide may be a good alternative.

  1. Apply hydrogen peroxide to the moldy surface (use a spray bottle)
  2. Let sit for 10 minutes or until it stops bubbling
  3. Scrub off the mold
  4. Wipe clean and let the surface dry

Tips for Cleaning Mold on Porous Surfaces

Whether you use the bleach solution or vinegar for cleaning porous surfaces like wood or drywall, it’s important to note a few things:

  1. Mix a little dish detergent with your cleaning solution.
  2. Apply the solution with dish detergent to the surface using a sponge or mop, but be careful not to oversaturate the surface.
  3. Do not rinse the solution away, but instead allow to air dry.

Last Step – The Cleanup!

It’s important to properly clean up after your efforts in order to prevent the mold from returning, so these tips may help:

  1. Seal any used rags, gloves, or moldy materials in a garbage bag
  2. Clean safety equipment like goggles with hot water and soap
  3. Soak any brushes you used in your bleach solution or vinegar for an hour before rinsing them off.
  4. Make sure everything is dry before storing.
  5. Wash your clothes right away — don’t let them sit in the hamper! Use hot water and don’t wash other clothes with them.

We hope these cleaning tips help to reduce your exposure to mold in your home to keep you healthy! For expert help, reach out to us first… Mold Remediation experts are always available.

Whether you need regularly scheduled cleanings, one-time cleanings, move-in / move-out cleanings, or construction cleanup, and even other services like mold remediation, upholstery or carpet steam cleaning and window cleaning… we handle it all, so give us a call. We are your ONE-STOP-SHOP for taking care of your home.

Always… At Your Service!
Call Howard: 949.215.9550

How To Clean Your Couch

Guide to how to clean your couch

Knowing how to clean your couch can be one of the most important bits of cleaning knowledge to keep your Living Room looking great.

After all, no matter what time of year or occasion — whether it’s the Holidays, or just “movie night” — your couch is probably the most popular piece of furniture in your Living Room. Just ask your other pieces of furniture. They’ll probably express how jealous they are of your couch getting all that attention. Boo hoo.

Of course, as a piece of furniture, being so darn popular has its downside. A nice glass of vintage 1982 Château Lafite-Rothschild may taste heavenly (if you’re a wine lover) but it makes for a truly hellish dark red stain on your thirsty couch.

And when the kids come back from swimming in deep puddles of mud (or whatever they do out there) and plop themselves down for a four-hour session of video games, your friendly couch seems more than happy to get the party started — and acquire some rather unattractive mud stains in the process. Then the dog joins in. Ugh.

Since we love our couches too, we thought we’d share some helpful tips for how to clean your couch and tackle those inevitable stains and spills.

Couch Cleaning 101: “Know Thy Couch Material”

Stop! Grabbing the nearest soapy sponge and frantically scrubbing away is most likely NOT your best move!

First, take a breath. Don’t panic. Although you don’t want to let the stain set-in and dry, your couch isn’t going to get any more stained than it already is. (Not sure that makes you feel better. Sorry.)

Now, locate those helpful tags you might find along the base of your couch, or attached to one or more of its cushions. You’ll want to identify exactly what type of material you’re dealing with.

I know, we all laugh at the legal warnings on those tags and love to rip them off out of pure spite. “Oh yeah? If I remove this tag I’ll get thrown in prison? Come get me, cop’a! You’ll never take me alive!!”

Hopefully you didn’t give in to your inner “1931 James Cagney” (old gangster film “Public Enemy”) and rip off the tags. Different materials require different methods of cleaning. Always check the specific care instructions to avoid damage. They usually show a particular code to indicate the best general method for cleaning:

  • “W” means it’s safe to use water to clean
  • “S” means it’s NOT safe to use water… use a solvent-based cleaner instead
  • “WS” means either water or solvent-based cleaners are safe
  • “X” means “vacuum only” – no water or solvent-based cleaners

The following are cleaning tips for various kinds of materials. Try to test the appropriate cleaning method on a small or hidden area first before going “all-in” on your cleaning.

How to Clean Your Fabric Couch

How best to clean your couch with a fabric upholstery will depend on the type of stain.

For beverage stains: first, confirm that it’s safe to use water by checking the care tag to see the “W” or “WS” code.

Next, create a DIY cleaning solution by combining the following in a clean spray bottle:

  • 1 cup of water (distilled preferred)
  • 1 tablespoon of white vinegar
  • 1 teaspoon of dishwashing liquid

Once combined, drop-in 1 tablespoon of baking soda and screw on the top before the bubbles overflow. (Combining the baking soda with the vinegar in the mixture will cause the solution to bubble. It’s science!)

Next, spray a white cloth with the cleaning solution. Then gently dab the stains with the cloth — don’t scrub or rub. To keep the stain from spreading as you work, start with the outer edges of the stain and move toward the center. Repeat as needed, then blot dry with a clean towel.

For food stains: dabbing with a mixture of warm water and dish soap may be enough. Again, dab, don’t scrub.

For pet stains such as urine or vomit: it’s best to use an enzyme-based cleaner specifically designed to deal with these types of stains. Dab, don’t scrub. You may then need to follow-up with a steam cleaning to fully remove the odors.

For ink stains: assuming your fabric care instructions show “WS” or “S”, dab rubbing alcohol with a cotton swab. Don’t use too much alcohol and oversaturate the fabric or the stain may spread.

For oil stains: cover the stain with cornstarch for 15 minutes and let it soak up the oil. Vacuum the cornstarch, then blot gently with soapy water (assuming it’s safe to use water on the fabric).

For blood stains: ok, if this is a frequently occurring problem… first, make a sign and nail it to your front door — it should read something like this: “No knives, razors or other sharp objects will be allowed while sitting on the couch. Make sure all boo-boos are fully bandaged before entering this establishment. Thank you. -The Management.” Although highly uncommon, if you ever find yourself strangely compelled to stab your guests, you really should seek professional help immediately. I’m serious. Halloween or not, it’s totally inappropriate. Just don’t do it!

Next, apply a small amount of hydrogen peroxide to the stain and let sit for 5 minutes. Blot dry with a paper towel and then rub gently with a damp microfiber cloth. Rinse the hydrogen peroxide away by repeatedly blotting with cold water and blotting with a dry cloth until all the hydrogen peroxide has rinsed out.

How to Clean Your Microfiber Couch

Microfiber couches can be a little tricky. Usually they will indicate “S” or “WS” on the care tag, meaning a solvent-based cleaner is your best option. Rubbing alcohol is a great solvent for this purpose.

Spray the stain with rubbing alcohol. Then scrub with a clean white cloth (yes, in this case it’s ok to scrub). Avoid using a colored cloth or sponge since the alcohol may transfer the color to your fabric.

After the fabric has dried (alcohol will dry quickly), finish by using a brush to fluff the fabric in a circular motion.

How to Clean Your Leather Couche

Leather couches come in various finishes. If your couch has a “protected leather” finish, then first test the following in a small or out-of-view area, then move on to the rest of the couch as needed:

  • Create a cleaning mixture of equal parts water and white vinegar.
  • Dampen (don’t soak) a microfiber cloth with the cleaning mixture.
  • Wipe the couch repeatedly, making sure to rinse the microfiber cloth after each wipe.
  • Dry with a clean microfiber cloth.

If your leather couch is not “protected leather” then check the suggested cleaning guidelines on the care tag.

We hope these cleaning tips on how to clean your couch help keep your home looking its best. Of course, if you need professional help, reach out to us first as we can refer a cleaning crew or upholstery care specialist to tackle tough cleaning needs. That’s what we’re here for!

Whether you need regularly scheduled cleanings, one-time cleanings, move-in / move-out cleanings, or construction cleanup, and even other services like upholstery or carpet steam cleaning and window cleaning… we handle it all, so give us a call. We are your ONE-STOP-SHOP for taking care of your home.

Always… At Your Service!
Call Howard: 949.215.9550

Best Ways to Clean Stainless Steel

best ways to clean stainless steel

Want to know the best ways to clean stainless steel? Howard’s got you covered…

From appliances to sinks and countertops, stainless steel is a popular surface material in modern kitchens. After all, stainless steel is attractive, durable, and stain resistant. It even keeps germs under control since it’s difficult for bacteria to grow on stainless steel.

But there is one drawback to stainless steel… fingerprints!

Cleaning stainless steel can be tricky. There are certain cleaning methods that work well on many surfaces but don’t work well on stainless steel, and can even damage the finish.

Wha-wha-whaaaatttt??

Yep… as it turns out, “stainless steel” can actually be stained after all! It’s stain resistant but not actually stainless, so I’m sure if there are lawyers reading this they may now be preparing the class action lawsuit of the century. But while you wait for that life-changing $1.75 settlement check to arrive in the mail, you can at least start cleaning your stainless steel the right way.

Here are some tips on the best ways to clean stainless steel — and we also point out some common cleaning mistakes you definitely want to avoid!

Let’s start with what NOT to do…

Stainless Steel Cleaning Mistakes

First, if you’re thinking of using a commercial cleaning product, be sure it’s safe to use on stainless steel before you go “all-in”. In other words, be sure to read the instructions and use as directed. Test it on a small, less noticeable area first. Be advised that using the wrong cleaners could even void the warranty on your stainless steel appliance.

As mentioned above, some common household cleaning products work great for many other surfaces but should be avoided with stainless steel.

  • Stay away from using anything abrasive. That includes cleanser, steel wool, or abrasive sponges. These can scratch the surface.
  • Avoid glass cleaner, furniture polish or chlorine-based cleaners, which can damage the finish and even leave stains.

The Best Stainless Steel Cleaning Solution

With all the fancy (and expensive) cleaning products out there, isn’t it hilarious how some of the safest and most effective cleaning can be done with the least expensive and most common household products?

In the case of cleaning your stainless steel surfaces, simple soap and water will work — just use a soft cloth or sponge and rinse with clean water before drying with a microfiber cloth.

But probably the best cleaning solution is simple, everyday, inexpensive white vinegar. Not only does it clear up those pesky fingerprints and oil, but it’s also a natural disinfectant.

Just fill a spray bottle with pure, undiluted white vinegar, spray the surface, and wipe with a rag in the direction of the grain. Then rinse by wiping with a rag dampened with clean water. If the vinegar fumes get a little too intense, just open a window or turn on a fan… the fumes will dissipate quickly.

Of course, sometimes as soon as you clean something, here comes someone to mess it up! It’s like the cleanest surfaces instantly become a magnet for dirty hands. So here’s a “post-cleaning” tip to help prevent new fingerprints after you’ve cleaned the surface: simply apply a small amount of olive oil or baby oil to a soft cloth and buff the surface. This adds a bit of shine and also helps repel new fingerprints, at least for a while.

The Best Way to Clean a Stainless Steel Sink

To effectively clean a stainless steel sink, we take the vinegar solution a step further.

First, rinse your sink thoroughly.

Next, make a paste of 1 part baking soda to 2 parts water and spread it across the sink’s surface. Don’t worry if you can’t cover it fully… just sprinkle a bit more baking soda around the sink.

Now, spray the surface with white vinegar. It will start bubbling-up. Don’t worry, as much as this looks like a science experiment, it will not blow up your kitchen. Instead, this chemical reaction is actually doing some cleaning for you.

At this point, take a clean soft sponge or rag and gently scrub the surface before rinsing with clean water.

Voila! A clean sink!

We love giving useful cleaning tips, but maybe you would rather have a true cleaning professional deal with your stainless steel surfaces and the rest of your kitchen… and then the rest of your home. We don’t blame you. That’s what we’re here for!

Whether you need regularly scheduled cleanings, one-time cleanings, move-in / move-out cleanings, or construction cleanup, and even other services like carpet steam cleaning and window cleaning… we handle it all, so give us a call. We are your ONE-STOP-SHOP for taking care of your home.

Always… At Your Service!
Call Howard: 949.215.9550

How to Clean Your Garbage Disposal

how to clean a garbage disposal

Your kitchen garbage disposal… friend or foe?

Ah, the kitchen garbage disposal. It can be a helpful friend in the kitchen or a smelly foe. We asked for some advice from professional housecleaning teams we refer to clients and got three smart and easy ways to clean it and keep your kitchen smelling fresh!

But first… what happened to garbage disposals? I’m half laughing as I ask this question, because anyone over the age of fifty will remember how you used to be able to put pretty much anything into the garbage disposal and never have a problem! It’s not like the blades were once made of titanium (and now they’re made of aluminum foil?), but nowadays, well, they just don’t seem to make ’em like they used to.

So the first step to keeping yours clean is to keep it functioning properly. It gets a lot more difficult to clean your garbage disposal with fibers from corn husks and celery wrapping around the blades or rancid solidified oil stuck in the motor compartment. Here are the key things to avoid putting down your sink and into your garbage disposal — even if it seems to be able to handle them well enough:

(1) Avoid grease and oil. These can solidify and clog your pipes and the parts of your disposal. And when oil gets rancid, it gets stinky!

(2) Avoid fibrous vegetables. Don’t torture your garbage disposal with stringy veggies like celery, asparagus or broccoli stems, and don’t even try putting corn husks or onion skin into the disposal. These things will wrap around the blades and not only cause jams, but will also create a great environment for breeding smelly bacteria.

(3) Avoid hard objects. “Don’t put fruit pits and bones into the disposal” goes without saying, but this also applies to things you don’t necessarily think of as “hard objects”, like eggshells.

And you’ve heard that coffee grounds are also bad for a sink. It’s true. But while your garbage disposal should be able to handle some wet coffee grounds with ease, the problem is what happens next — they will expand and form a clog deeper in your drain.

Now, even though you have a well-functioning garbage disposal that you continue to use carefully, you still need to regularly clean it. Bacteria will build up in your disposal and create some unpleasant and unappetizing smells in your kitchen. Here are three smart ways to keep your garbage disposal clean…

Cleaning Tip 1: Use Ice Cubes and Salt

A common problem with disposals is that debris will build up on the blades and other parts of the disposal and along the walls. This simple trick will dislodge that debris and clean the blades.

Simply place a handful of ice cubes and a quarter cup of salt into the disposal. While running some cold water, turn on the disposal and let it clear.

Using ice cubes like this is not something you want to do every day, because after all, ice cubes are “hard objects” and hard objects should generally be avoided, but doing this on a monthly basis will not damage the blades… it will actually help keep them sharp. Ice cubes break down much easier than bones or fruit pits and will give your disposal a good scrub without damaging your blades.

Cleaning Tip 2: Use Vinegar and Baking Soda

As a kid, I used to love dazzling my friends with highly sophisticated scientific experiments, like mixing vinegar and baking soda. Little did I know, this simple household mixture is one of the most effective ways to clean and freshen a garbage disposal! Let’s Go, Science!

First, before you do anything else, get the water running hot. You’ll need it for the final step.

Next, battle some nasty odors by dumping a half cup of baking soda into the disposal. “Pulse” the disposal with a couple brief “on & off” actions to get that baking soda worked in. Let it sit for a 15 minutes. Don’t run the water.

Then, pour a cup of white vinegar into the disposal. Again, don’t run the water. You should hear it fizz. That’s the sound of science hard at work, loosening up residues that builds up in the disposal and giving it a good clean.

Wait a few minutes while the cleaning process occurs and then run some hot water to rinse it all down and help further remove any remaining debris and residue.

Cleaning Tip 3: Use Citrus and Baking Soda

This is a great way to keep things fresh and can be done on a daily basis.

Like Tip #2 above, start with a half cup of baking soda into the drain. “Pulse” the disposal with a couple “on & off” actions to get the baking soda worked-in, and then let it sit for 10-15 minutes to soak-up those nasty smells.

Next, drop in some small cut pieces of orange or lemon peels, run some cold water and run the disposal until clear.

Citrus oil is a natural de-greaser and will help break down oils and greasy build-up. It’s also a great natural deodorizer. And finally, the acids in citrus have some antibiotic properties. Although they don’t directly kill bacteria, they do create an environment that prohibits growth of nasty bacteria, including e. coli and salmonella.

No More Garbage Disposal Smells!

The garbage disposal is a leading source of foul kitchen odors, and these cleaning tricks will solve that problem!

Would you rather have a true cleaning professional deal with your sink and the rest of your kitchen… and then the rest of your home? If you answered “YES!” we don’t blame you. That’s what we’re here for!

Whether you need regularly scheduled cleanings, one-time cleanings, move-in / move-out cleanings, or construction cleanup, and even other services like carpet steam cleaning and window cleaning… we handle it all, so give us a call. We are your ONE-STOP-SHOP for taking care of your home.

Always… At Your Service!
Call Howard: 949.215.9550

House Cleaning for Seniors – 5 Reasons Why It’s Important

House Cleaning for Elderly People

The Importance of House Cleaning for Seniors

Maintaining a clean and organized living space is crucial for everyone, but it holds particular significance for elderly individuals. Here are some key reasons why house cleaning is essential for seniors:

1. House Cleaning for Health and Safety

A clean home reduces the risk of infections and illnesses. Dust, mold, and bacteria can lead to respiratory issues and other health problems, which can be particularly severe for older adults with weaker immune systems. Regular cleaning helps to keep these hazards at bay. The cleaning professionals we refer are well acquainted with all the places dust, mold and bacteria can hide — and know how to clean them well!

2. House Cleaning for Fall Prevention

Clutter and unclean floors can be major tripping hazards. For elderly individuals, falls can lead to serious injuries and long-term health issues. Keeping the home tidy and free of obstacles can significantly reduce the risk of falls. Many seniors may have difficulty bending and moving objects around their home, which means it’s that much more important to get outside help from cleaning professionals!

3. House Cleaning for Mental Well-being

You’ve heard the saying, “You are what you eat.” Well, something similar could be said about your surroundings — they have a direct impact on your state of mind. Studies show that a clean and well-organized environment can have a positive impact on mental health. It can reduce stress and anxiety, providing a more pleasant and comfortable living space. This is especially important for elderly individuals who may spend a lot of time at home.

Sometimes we get so used to our “clutter” that we overlook the fact it takes more energy to manage than we realize. You may know where everything is even in a mad pile of papers, but it will be so much easier to find what you need in a tidy environment!

4. Independence

Regular house cleaning can help elderly individuals maintain their independence. By ensuring their living space is safe and manageable, they can continue to live in their own homes longer without the need for constant assistance. Just a quick weekly touch-up from a cleaning professional might be all it takes!

5. Social Engagement

A clean home can encourage social interactions. Elderly individuals may feel more comfortable inviting friends and family over, which can help combat loneliness and isolation.

For seniors, house cleaning is not just about aesthetics; it’s about creating a safe, healthy, and comfortable environment. Regular cleaning can significantly improve their quality of life and well-being.

Whether you need regularly scheduled cleanings, one-time cleanings, move-in / move-out cleanings, or construction cleanup… we handle it all, so give us a call.

We also have GREAT REFERRALS for Carpet Steam Cleaning, Window Cleaning and more… we are your ONE-STOP-SHOP for taking care of your home.

Always… At Your Service!
Call Howard: 949.215.9550

What is Deep FOG Sanitizing?

deep fog sanitizing

If you’ve been following us for the last few months, you may have noticed we’ve been expanding our menu of services we refer to include all sorts of home care in addition to our signature Maid Service (see the full list below). Now we’ve added something new and truly amazing: Deep “FOG” Sanitizing & Antimicrobial Treatment!

The Ultimate Deep Cleaning

Your ENTIRE living space can be TOTALLY sanitized in LESS THAN 30 MINUTES. How? With Deep “FOG” Sanitizing!

This is a remarkable process where the cleaning professional uses a special “electro-static emitter” to put a sanitizing “fog” into the air that penetrates every part of your home or apartment.

Within just a few minutes of dwell time, EVERYTHING in your space will be completely sanitized. All surfaces, walls, carpets & floors, all surfaces, windows and sills… EVERYTHING.  It gets into every nook & cranny.

The whole process takes no more than 30 minutes.  It’s also 100% people and pet-safe, and with ZERO odor.  Best of all, it’s surprisingly affordable.

It’s like the ultimate “deep cleaning”!  Since it doesn’t remove dust, we recommend a maid cleaning first. And if you’re looking to completely sanitize your space — especially if you’re at risk for illness, or to clean-up after an illness — there is simply no betterconvenient & quick, or affordable solution.

We’re Your “One-Stop Shop” for Home Care

Our clients ALWAYS receive special deals and referrals from our “ONE-STOP SHOP” family of home care service providers, including:

  • Maid Service (our signature service) — weekly, bi-weekly, 3+ times per week, occasional cleanings, move-in/out, or one-time cleanings
  • Carpet & Upholstery Steam Cleaning
  • Window Cleaning
  • Handyman Services
  • Stainless Steel * Copper * Hard Water Restoration — don’t replace it, REPAIR IT!
  • Stone Care Specialist — knowledge and experience with the maintenance and care of all types of Stone Mediums
  • Wood Floor Specialist — experts with the care and maintenance of all types of Wood Floors and Finishes
  • NEW: Deep “FOG” Sanitizing & Antimicrobial Treatment — sanitize your ENTIRE living space in 30 minutes or less!

From Irvine to Glendale, Newport Beach to Long Beach, Mission Viejo to Pasadena and everywhere in between, we’ve got you covered with expert specialty home care specialists!

We only refer top-quality home-care professionals and maids (independent domestic workers) that are security-conscious, with wonderful personalities. They know how to get the job done right!

Get a call back!